
Synchronization allows you to connect your iCloud calendar to your Doctoranytime agenda, making it easier to manage your appointments and availability.
Follow the steps below to set up synchronization.
1. Check that synchronization is included in your subscription
Before you begin, log in to your Doctoranytime account and go to Settings > Agenda.
If synchronization is included in your subscription, you will see a blue “Import” button at the bottom of the page.
Can’t see this button?
This means synchronization is not included in your current subscription.
To activate this feature, contact your Account Manager at care@doctoranytime.be.
2. Do you practise at several locations? Prepare your iCloud calendars
This step only applies to practitioners who have more than one practice address on Doctoranytime.
If you practise at several locations, it is important to create a separate iCloud calendar for each address before setting up synchronization.
Why is this necessary?
If you synchronize the same iCloud calendar with several practices, appointments booked at one address may also appear at the others.
Example:
A patient books an appointment at 11:00 a.m. at Practice A.
This appointment is automatically added to your iCloud calendar.
If Practice B is synchronized with the same iCloud calendar, the appointment may also be imported into Doctoranytime for Practice B.
This can create unnecessary unavailability or make some appointments appear to be duplicated.
How can you avoid this?
Create a separate iCloud calendar for each practice address.
For example:
iCloud calendar “Brussels Practice”
iCloud calendar “Namur Practice”
To create these calendars, follow Apple’s official instructions:
Create and edit a calendar on iCloud.com – Apple Support
You can then select the relevant calendars individually when configuring synchronization in Doctoranytime.
If you only have one practice address, you can go directly to the next step.
3. Start the Cronofy import
From your Doctoranytime account:
Go to Settings > Import.
Click the blue “Cronofy Import” button.
A new Cronofy window will open so you can connect your external calendar.
4. Choose iCloud
In the Cronofy window, select the calendar provider you want to synchronize.
In this case, choose iCloud, which is the first option displayed.
5. Authorize access to your iCloud calendar
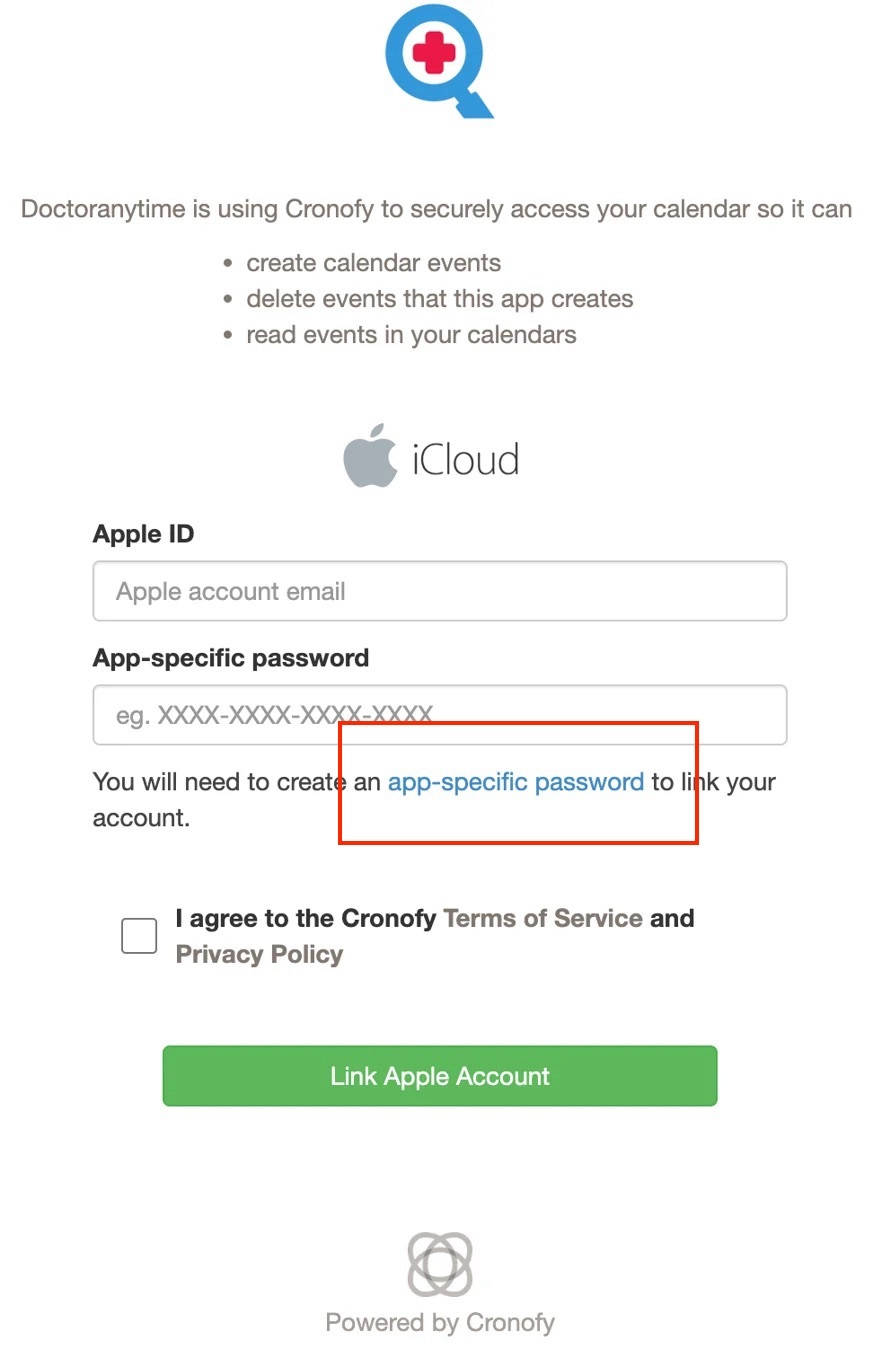
Cronofy will request secure access to your calendar.
Before entering your details, click “app-specific password” (in blue). You must first authorize the connection. Do not enter your usual login credentials here!
6. Sign in to your Apple account
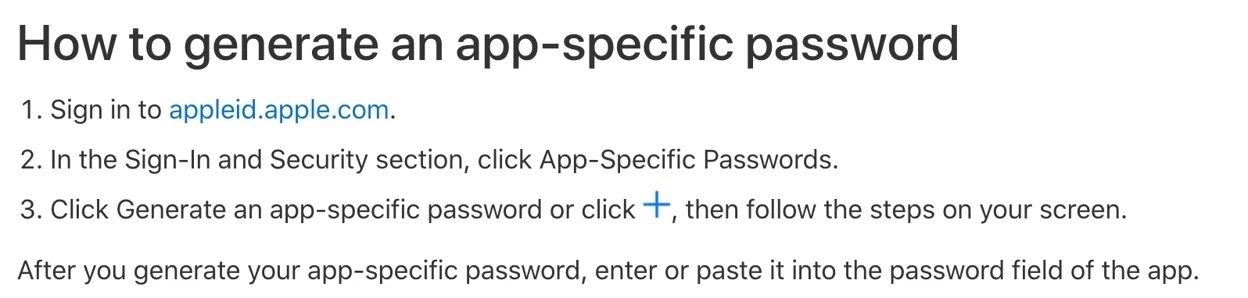
After clicking “app-specific password”, you will be redirected to a page explaining how to generate one.
Click the blue appleid.apple.com link.
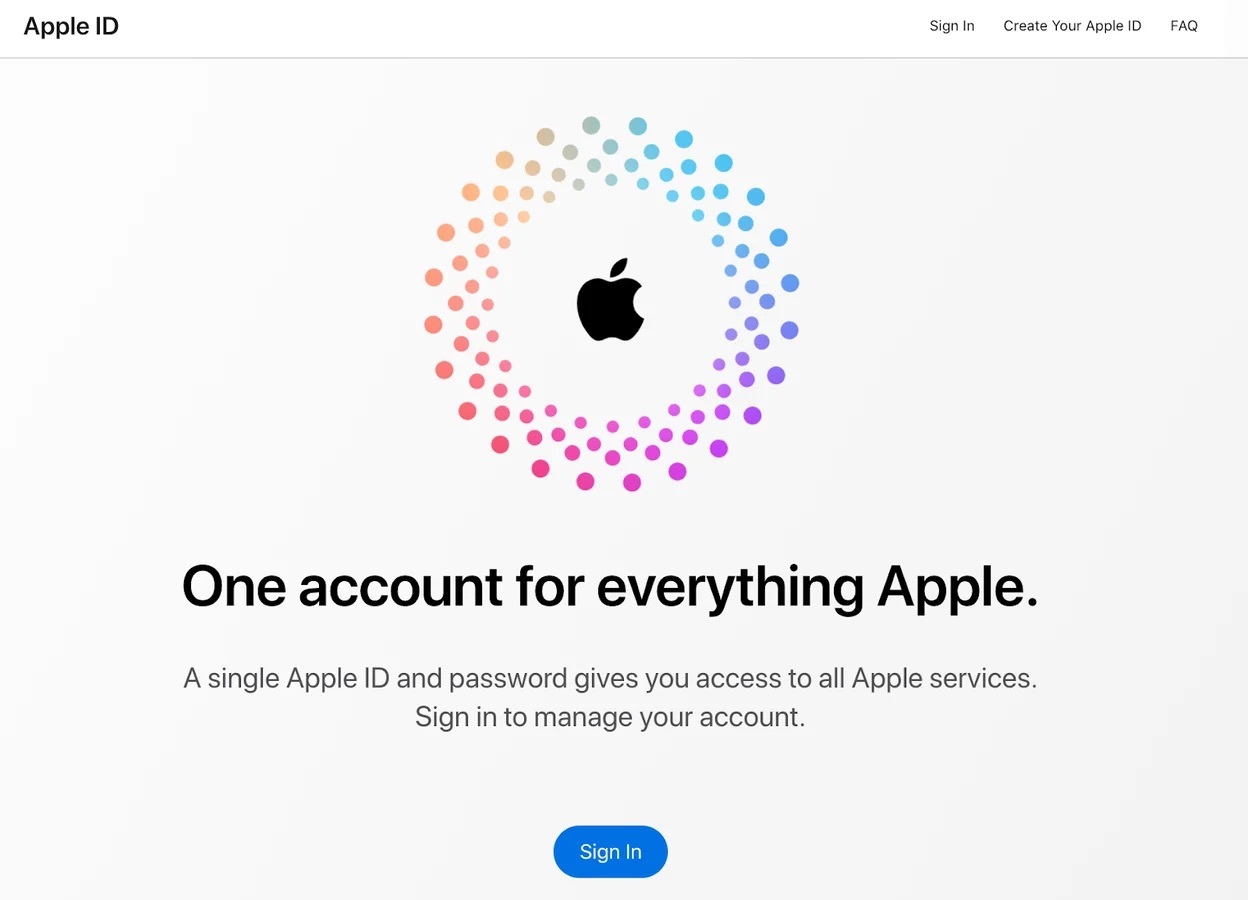
A new page will open.
Click “Sign In”.
Enter the email address associated with your Apple account (Apple ID).
Enter your usual Apple password.
Complete two-factor authentication using the code sent to your Apple device.
7. Generate an app-specific password for Cronofy
Once signed in to your Apple account, find the “App-Specific Passwords” section.
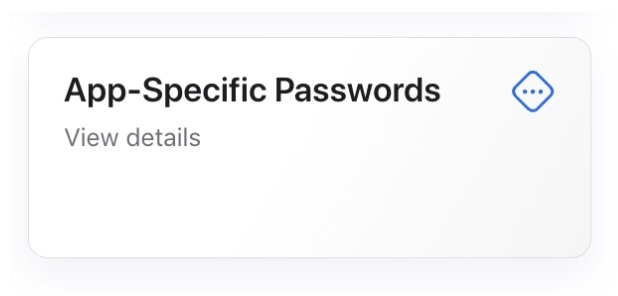
Click “Generate an app-specific password”.
When Apple asks you to name the app, enter Cronofy.
Click “Create”.
Confirm your Apple password if prompted.
Copy the generated password before closing the window.
8. Connect your Apple account to Cronofy
Return to the Cronofy window you opened earlier.
Enter your Apple ID (the email address associated with your iCloud account).
Paste the app-specific password you just generated, not your usual password.
Accept the terms and conditions.
Click “Connect an Apple account”.
9. Configure synchronization options
Once your iCloud account is connected, you can select the calendars to synchronize.
You will need to choose:
The iCloud calendars to import into Doctoranytime: events in these calendars will be taken into account in your Doctoranytime agenda.
The iCloud calendars to which Doctoranytime appointments will be exported: appointments booked through Doctoranytime will appear in the selected calendars.
If you practise at several locations, make sure to select the iCloud calendar corresponding to each address, as explained in step 2.
This will help you keep your calendars organized and prevent appointments from one practice being imported into another.
Once you have made your selections, click “Save options”.
10. Enable full access
For synchronization to work correctly, you must also enable the “Full access” option.
Click the grey “More options” button.
Click “Full access”.
Grant the requested permissions.
11. Start synchronization
Once full access is enabled:
Click “More options” again.
Select “Start synchronization”.
Your iCloud calendar is now synchronized with your Doctoranytime agenda!
You can now manage your appointments and availability using the calendars you selected.
Need help?
If you encounter difficulties during setup, you can consult our Doctoranytime Help Center or contact our team at care@doctoranytime.be.