.png?width=200&height=69&name=Type=Default%20(2).png)
The Agenda landing page consists of the toolbar, the agenda-calendar, the shortcuts, and the support chat.
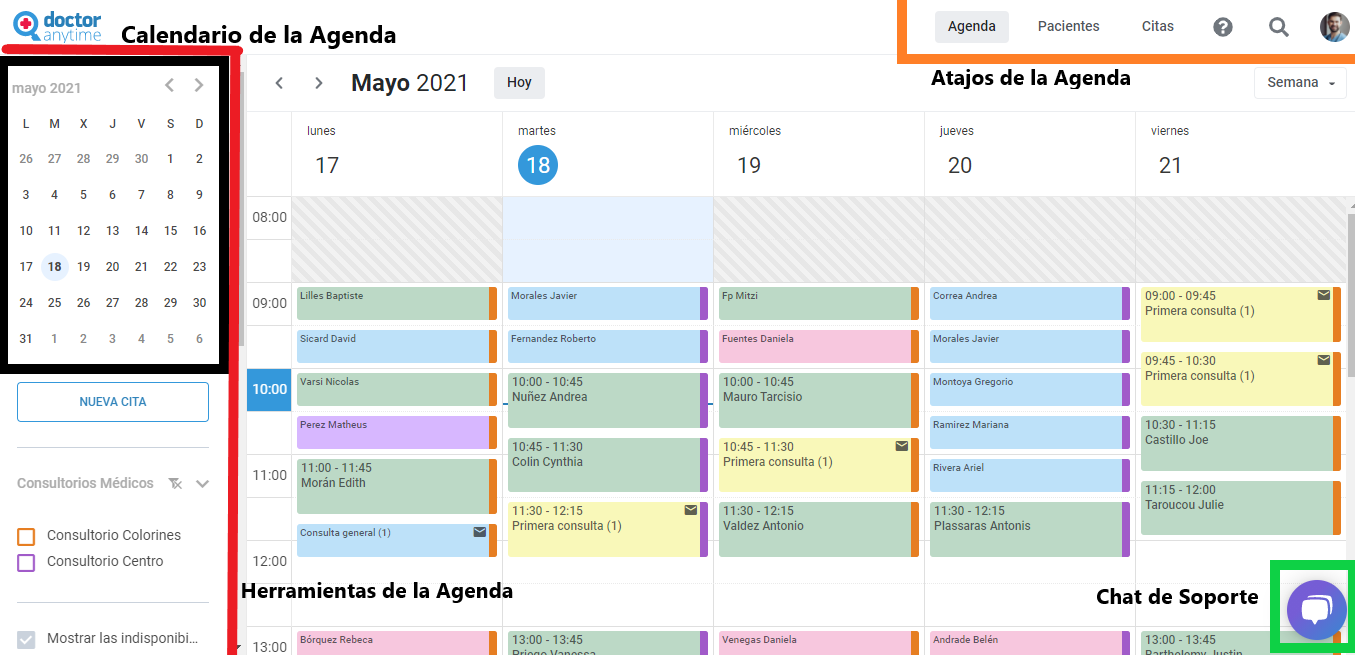
Toolbar
The toolbar covers the left part of the page and consists of the following:
- Calendar: Shows a monthly calendar and indicates the current date
- New Appointment button: Allows you to quickly schedule a new appointment
- Your practices: Here you can change the display of your agenda depending on the practice you select. For example, if you only attend a specific office on Thursdays and want to see the appointments for that day, you can select that office. This also applies to its video consultation availability.
- Busy periods: Display or hide your unavailability by enabling this option
- Icons (legends): These will appear in your agenda and appointments. For more detail click here [link to article].
- Labels: You can categorize your time slots by labeling your availability and using Color Coded backgrounds.
Calendar
The main calendar is located In the central section. Here you can see all your appointments and availability. You can change the calendar view in settings {link to article} to see information by month, week, three days, or by day.
Shortcuts
In the top-right part, you will find some shortcut buttons. They will help you navigate through sections faster:
- Agenda: Takes you back to the agenda
- Patients
- Appointments
- ? Help: Takes you to the Help Center
- Search for patients
- User Menu: You can use it to navigate through the different sections of the platform

Support Chat
Located at the lower right corner.

You can access it from every section. For more detailed information on how to use it go to.