
Enable Manual Appointment Confirmation
To enable manual confirmation for your appointments:
1. Go to the Availability tab.
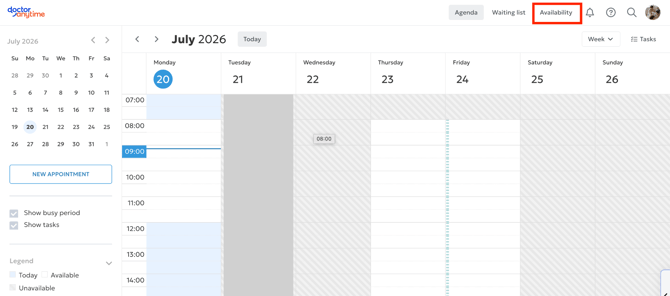
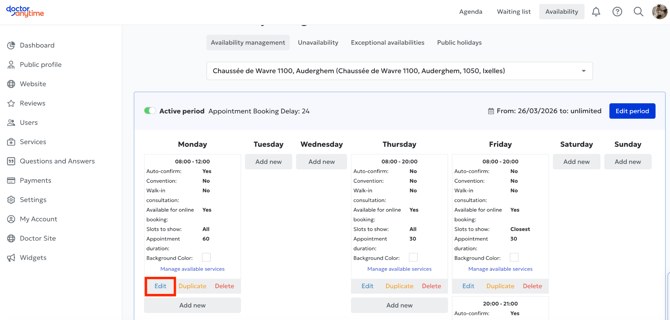
2. Select the availability slot for which you want to enable manual confirmation.
3. Click Edit.
4. Enable Manual confirmation by disabling Automatic confirmation, then save your changes.
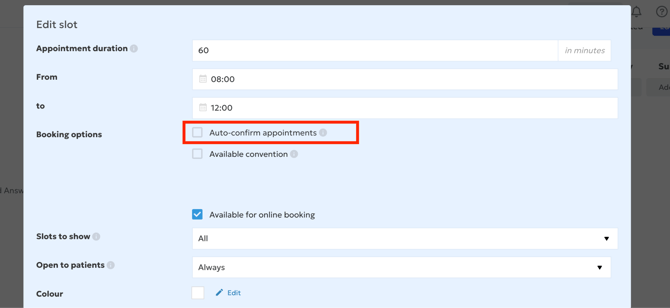
To learn more about the different confirmation options, please refer to our dedicated article: link.
Notes
- If you would like to enable manual confirmation for all your availability slots, repeat these steps for each one.
- When creating an exceptional availability, remember to disable Automatic confirmation as well if you want appointments booked during that availability to require manual confirmation.
How does manual confirmation work?
When manual confirmation is enabled:
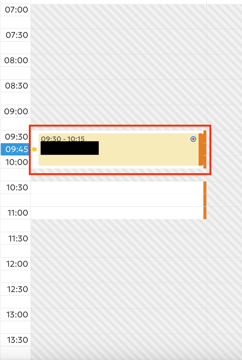
- New appointment requests appear in your calendar with a yellow circle, allowing you to identify them quickly and, if necessary, contact the patient before confirming the appointment.
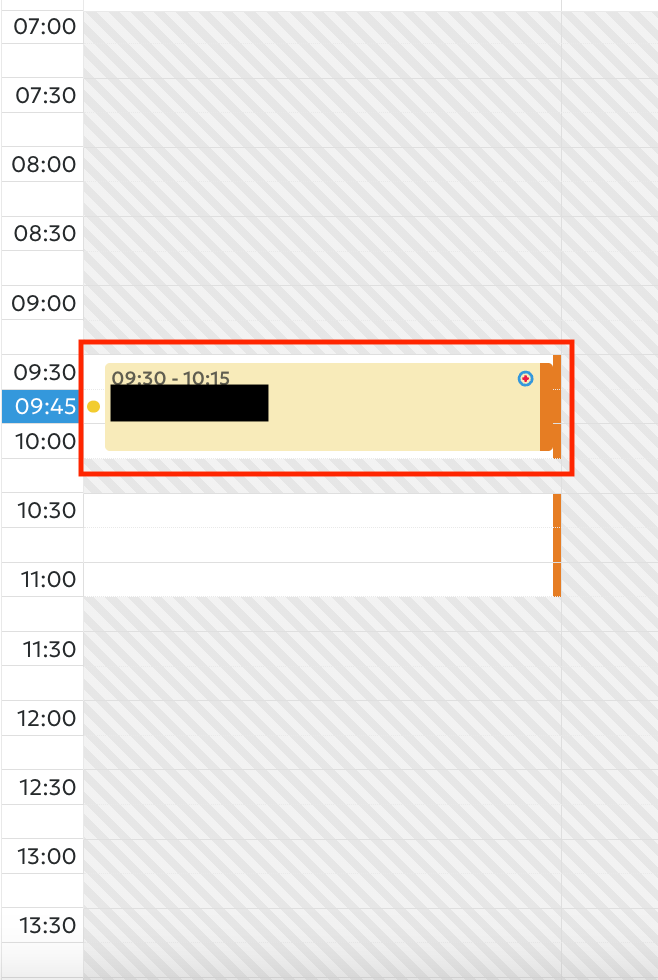
- If you do not wish to accept a request, simply delete the appointment. The time slot immediately becomes available again for a new booking.
- You receive a notification for every new appointment request:
- by email;
- by SMS;
- and/or via push notification if you use the Doctoranytime mobile application.
Once you confirm the appointment, the patient automatically receives a confirmation.
Confirm an appointment from your calendar
To confirm an appointment request directly from your calendar:
1. Click on the appointment marked with the yellow circle.
2. If you want to keep the proposed date and time, click Confirm.
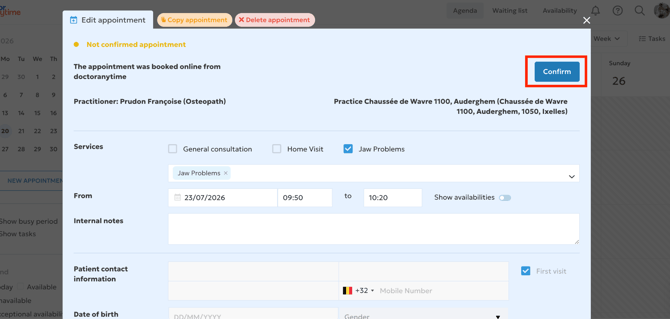
3. If you want to change the date or time, make the necessary changes first and then confirm the appointment. You can also edit the appointment later if needed.
4. Once the appointment is confirmed, the yellow circle disappears and the appointment is displayed as confirmed in your calendar.
Confirm an appointment from the notification email
Each time you receive a new appointment request, you will receive an email entitled: "Doctoranytime - You have a new appointment request"
To confirm the request:
1. Open the email. Click Manage appointment.
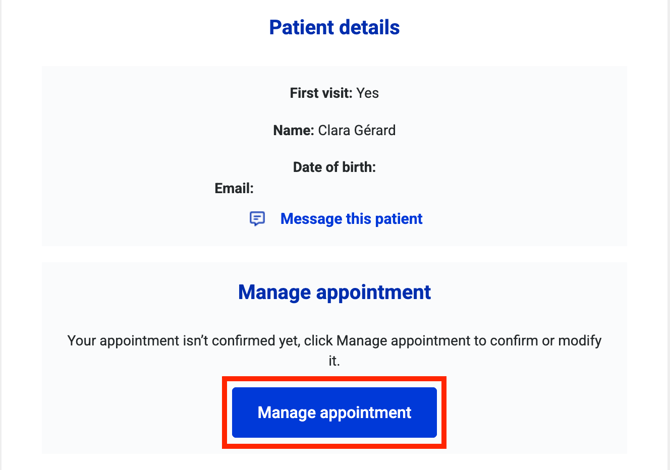
2. An appointment management page will open.
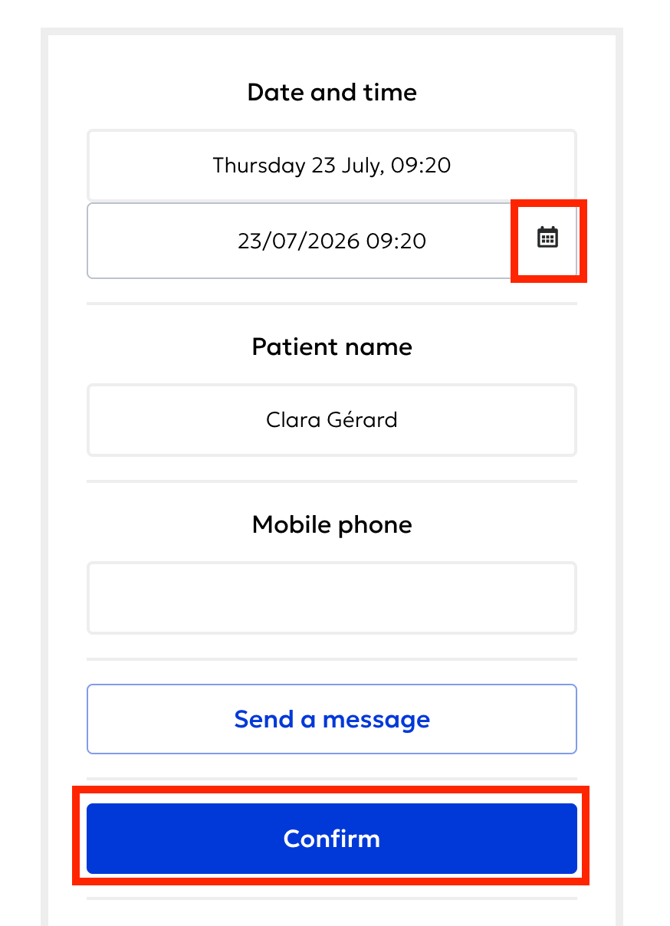
3. If you want to confirm the appointment as it is, click Confirm.
4. If you wish to change the date or time, click the Calendar icon, make the necessary changes, and then confirm the appointment. You can also edit the appointment later from your calendar.
Notes
- Until an appointment has been confirmed, it remains marked with a yellow circle in your calendar.
- If you delete an appointment request before confirming it, the time slot immediately becomes available again for other patients.